Preamble
Many people have difficulty deleting data from their systems, even when this data is outdated and still widely available online. If you are one of these people, you may in fact be a digital data-hoarder.
For example, if you’ve watched last night’s episode of Coronation Street, do you delete it from your Plex or Jellyfin library, or do you just archive it into an “old episodes” folder? For many, the sensible solution would be to delete the episode as it’s consuming valuable disk space and the chances of you ever wanting to re-watch the episode, particularly months or years into the future are slim. For data hoarders, this isn’t the case, they would just archive the episode and when their storage is reaching capacity, they would extend it by purchasing more hard drives.
I recently found myself in this predicament. I would usually just order another drive, but unless you’ve been living under a rock for the past year, you’ll be aware that there’s a global microchip shortage. Not only has this caused issues with things like new car production but it’s also meant the cost of hard drives has surged.
For example, I bought a WD 14TB Elements drive online, pre-pandemic for £190 (about £13.60 per TB). As of today, that same drive would cost me £340 (over £24 per TB)!
There are three choices I can make:
- Pay the inflated (rip-off?) price of a new drive.
- Delete some old data.
- Get creative and free up some space using compression/deduplication
As you might have guessed from the title of this post, I’m going to see if option 3 is viable (I mean, I might need those episodes of Coronation Street from 2014 at some point, right?).
What is compression?
Most readers can safely skip over this section, I’ll provide a quick explanation of general compression for those new to the hobby, however.
Compression is a way to take your existing data and squash (i.e. compress) it down so that it takes up less space on your storage system.
There are two types of compression, lossless and lossy:
Lossless compression
Lossless compression takes your data and compresses it in such a way that when you need to access it again, it can be decompressed back to its original state. When data compressed with lossless compression is decompressed, the resulting decompressed data is identical to the original data. You may be familiar with “ZIP files”, which use a form of lossless compression. You can “zip up” your documents and when you choose to un-zip them, the documents are exactly as they were before.
To give you a basic, high-level example of how lossless compression works, imagine I want to store the following text:
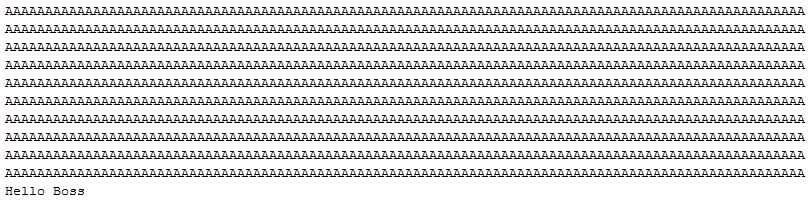
I could just store it as-is, and it would consume 1010 “characters-worth” of space.
Alternatively, I could just save the following, which would only take up 44 characters-worth of space:

Lossy compression
As the name suggests, when data is compressed with lossy compression, some of the original data is discarded. This means when you decompress your data is will be somewhat different from the original data you compressed.
An example of lossy compression would be converting an audio CD to an MP3. When the audio is compressed, some of it (for example, frequencies inaudible to the human ear) is thrown away. When you play the MP3 back, you’ll likely still be able to enjoy the song but it won’t be exactly the same quality as the CD.
Another good example of lossy compression is video compression. If you take a BluRay movie and compress it to, for example, MP4, you’ll likely still be able to watch the compressed version but you may notice some colours aren’t as vibrant and some fine details may be missing. Areas may even seem blocky at times.
What is deduplication?
As the name suggests, deduplication is the process of finding duplicated data on your storage and removing all but a single copy of it. Any references to the removed data (such as a filename) are updated to point to the single remaining instance of the data.
In the examples below, we have a handful of MP3s on our filesystem, two of them are duplicates despite having different filenames. Before running deduplication, the filesystem may look something like this:
After deduplication, both duplicated files still exist with their unique names, yet the underlying data on our disk for the second file has been deleted and is free for us to use for something else. The filename remains as it was but it’s pointing to a different version of the underlying data.
This is of course a very basic, oversimplified example, but hopefully, it’ll help you visualise what happens during deduplication.
Deduplication isn’t restricted to just operating on duplicate files but is able to work on the underlying blocks containing the partial contents of each file. For example, say you had two different Word documents, yet the first 20 pages of each were identical. It’s possible that deduplication could help here, and make sure your disks only hold a single copy of the data needed for the first 20 pages.
What is BTRFS?
BTRFS is a filesystem available on Linux systems. It was originally developed by Oracle back in 2007 and was declared stable in 2013. Luckily I’m already using BTRFS on my NAS, as the filesystem lends itself well to both compression and deduplication.
Testing Time
I’m going to perform a few tests to determine whether or not compression and/or deduplication are going to save the day by helping me avoid buying another over-priced drive.
I’m not going to risk my main data sets, so I’ll set up a little demo environment that we can destroy and rebuild if necessary.
For the purposes of this test, I’m going to format an old 1TB hard drive as BTRFS, then I’m going to copy a selection of media files to the drive, firstly without any compression or deduplication, and then later with both. We’ll check how effective both compression and deduplication are on this data set.
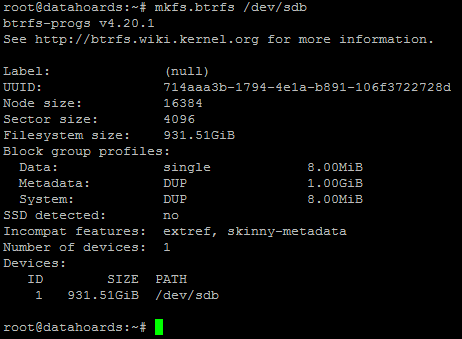
Let’s start by formatting our 1TB drive to BTRFS. Note that for the purposes of this test, to reduce overhead, I’m not going to first partition the disk. Usually, you would want to create a partition and then format that partition with BTRFS.
Now the disk is formatted, we’ll mount it, without compression:

Now, I just need to copy across some sample data and then list these files:
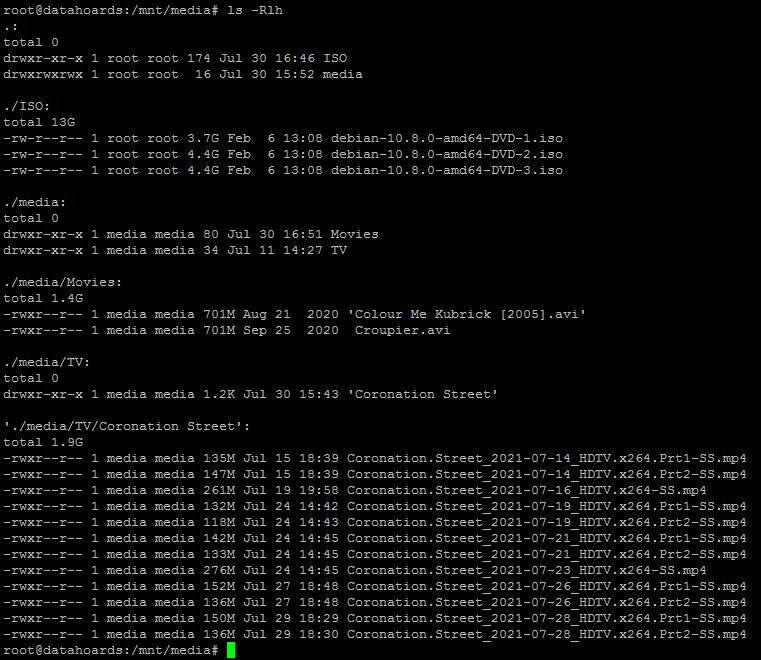
As you can see, the sample data consists of some TV shows, movies, and software media. The sample files consume around 16GB between them.
Testing BTRFS compression
Firstly, the tool to check the effective compression of a BTRFS volume is called “compsize”. For consistency, we’ll use this tool to check the currently consumed space of our volume, even though compression isn’t yet enabled:

As we’d expect, there’s no saving from compression yet (because it’s not enabled!), the files are consuming 100% of their original size.
Now let’s unmount the BTRFS volume and remount it with compression enabled. We’ll use ZLIB compression with the highest setting (9). This is generally considered the best combination for achieving maximum compression when you’re not concerned about speed or CPU/RAM consumption.

Because we added the files to the volume whilst it was mounted without compression, we now need to tell the filesystem to compress these existing files. This is done simply by issuing a defragment command like this:

The “-r” switch, in case you’re wondering, tells the tool to defragment all the files recursively (going into each sub-directory). The process was completed in around 30 seconds.
We’ll run the compsize tool once more and see what if any benefits the compression has afforded us:

Oh dear, our files have only been compressed to 99% of their original size, despite us using the most aggressive BTRFS compression settings. This means we’ve only saved around 1% space.
To be fair though, I realised at this point that the files I was trying to compress were probably not the best candidates. If you think about it, video files and ISO files, are already pretty well compressed, to begin with. I decided I’d trawl through my old NAS box and cherry-pick a few file formats that I felt certain would compress well.
I stumbled across a ton of MIDI files that I downloaded some time ago. In case you’re not aware, MIDI files are basically text files containing instructions for a MIDI player/Synthesizer to re-create instrumental sounds. As text files generally compress very well these should be a good choice.
As well as the MIDI files, I also found two huge “word lists”. A word list is a text file containing commonly used passwords. It’s generally used with Linux systems to prevent users from creating accounts with weak passwords that feature on that list. Again, these should compress very well.
Let’s copy the MIDI files and word lists to the BTRFS volume and see how things stand in terms of space consumption. Because the volume is already mounted with compression, the files will be compressed as they’re saved to disk. There’s no reason for us to run the defrag command again:

So our 190,000 MIDI files have compressed quite nicely. They now only consume 33% of the space they did in their uncompressed state. Just for fun, let’s perform a sense check on a random selection of tracks. I’m going to target any ABBA tracks for this test because, well, why now?
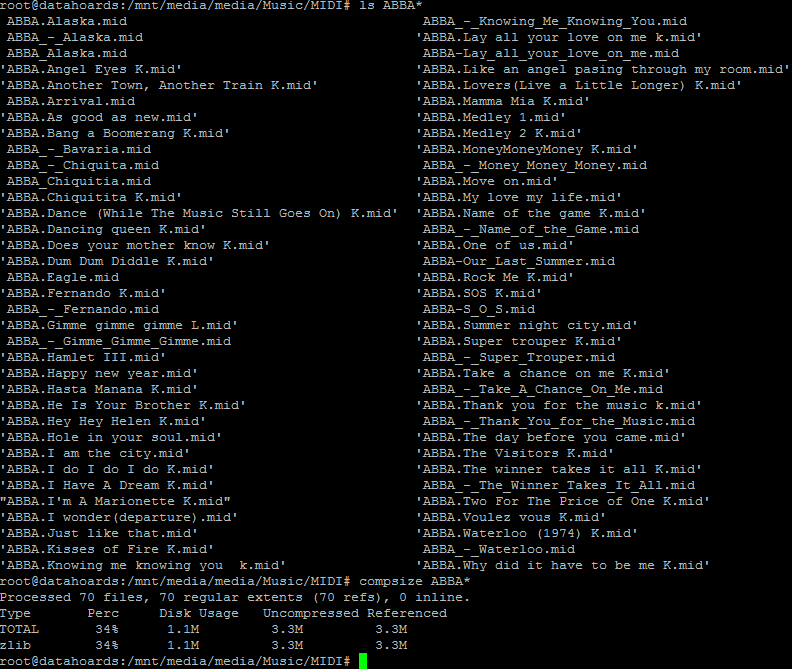
As I would expect, the compression level is consistent, with the ABBA tracks consuming just 34% (1.1MB) of their original space.
Unfortunately, checking the compression and space-saving on our two massive word lists gave me a bit of a surprise:
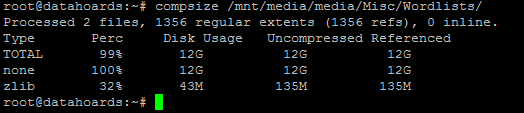
For some reason, despite them being plain text files that should compress very well, they’ve hardly compressed at all, still consuming their original 12GB between them. I’ve read about a “feature” of BTRFS that stops compression if it determines that the beginning of the file isn’t compressing well enough to justify the increased CPU workload. I thought this may be the case here, that due to the size of the files, the CPU time compressing them was racking up and the system decided it wasn’t worth the effort.
I decided to unmount the volume and mount it using the “-o compress-force=zlib:9” parameter. Using compress-force rather than just compress should force the system to attempt compression on all files regardless of its effectiveness or CPU overhead.

After remounting, I ran the defrag process again which was completed after around 10 minutes. Sadly, running the compsize tool again, there was no change. The word lists were still showing no saving, still consuming the full 12GB.
At this point, I was a little confused. I knew that text files should compress very well and everything I’d read had told me that using the compress-force option would force BTRFS to compress them. After some searching, I found an old BTRFS mailing list post (here) that gave me some hope. It stated that once BTRFS has determined that a file won’t compress well, not only does it halt the compression, it also sets a flag against the file, so that it knows not to attempt compression in the future. Apparently, even compress-force will respect this flag and not attempt to compress the file.
The BTRFS developer making the post stated that the only solution was to remount the volume using compress-force (which I’d already done) and to then re-write the problem files (clearing the “do not compress” flag).
Despite the post being 12 years old, I decided to try it. Sure enough, after deleting the files and re-copying them from the NAS, they’ve compressed to just 39% of their original size. I must admit that the copy process took much longer than I expected (around an hour), which is probably why BTRFS initially deemed the compression too costly in terms of time and CPU usage.

Testing BTRFS deduplication
With the BTRFS compression testing deemed a success, it’s time to see if I can save even more space by enabling deduplication. There are a few different deduplication tools available for BTRFS but the one I’ve settled on is “duperemove”. It’s fairly well regarded and I like the fact that it defaults to read-only mode so that you can easily tell in advance what it’s planning to do. Let’s run the tool and see what it reports:
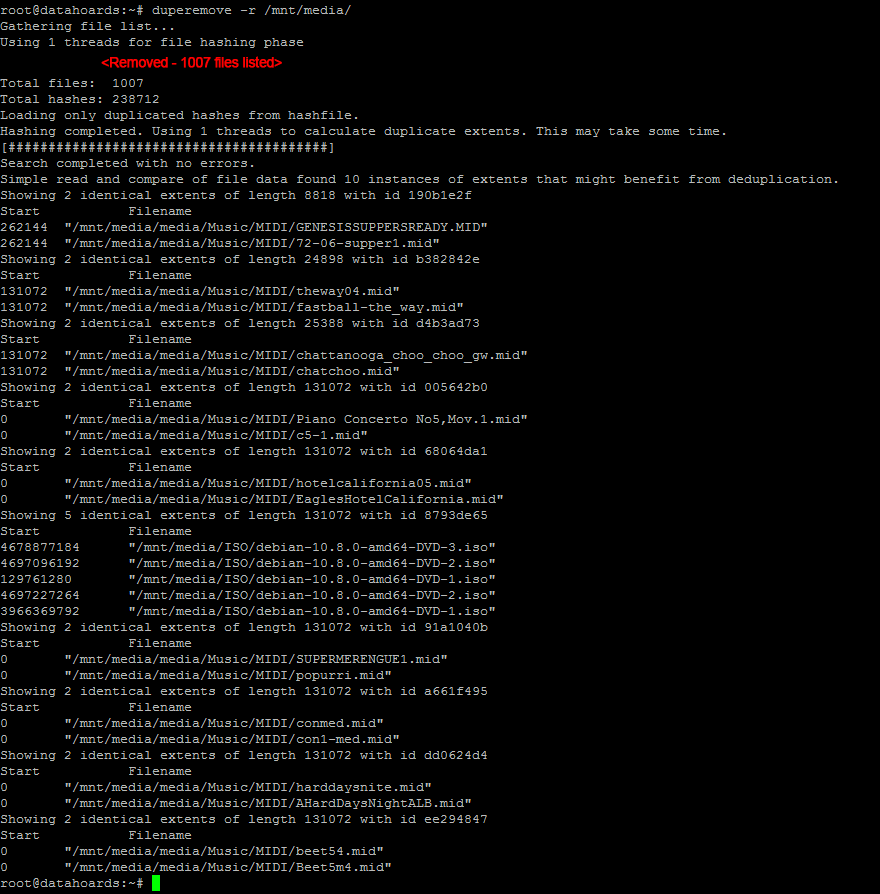
I was rather surprised by this result at first. Duperemove seems to have only found around 10 files with duplicate blocks. I was sure that a high proportion of my huge collection of MIDI files must be duplicates. After some further reading of Duperemove’s MAN page, I ran it again with the -v switch (for increased verbosity) and all became clear:
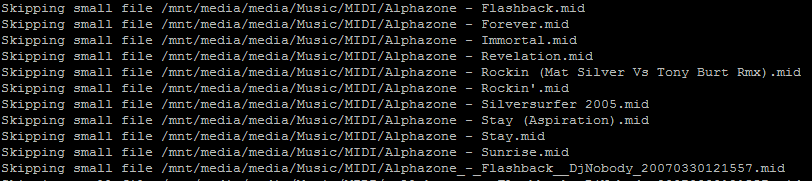
Of course, the nature of MIDI files means they’re small in size. As Duperemove defaults to a block size of 128KB, any file smaller than this wouldn’t be considered. I briefly contemplated reducing the block size and rerunning the dedupe but I decided against it. This use case is fairly niche and I also found this article in which the author determined the increase in metadata needed to deduplicate smaller block sizes negated the benefit.
Regardless, I checked the current disk usage, ran Duperemove, rechecked the usage and there was a slight improvement.


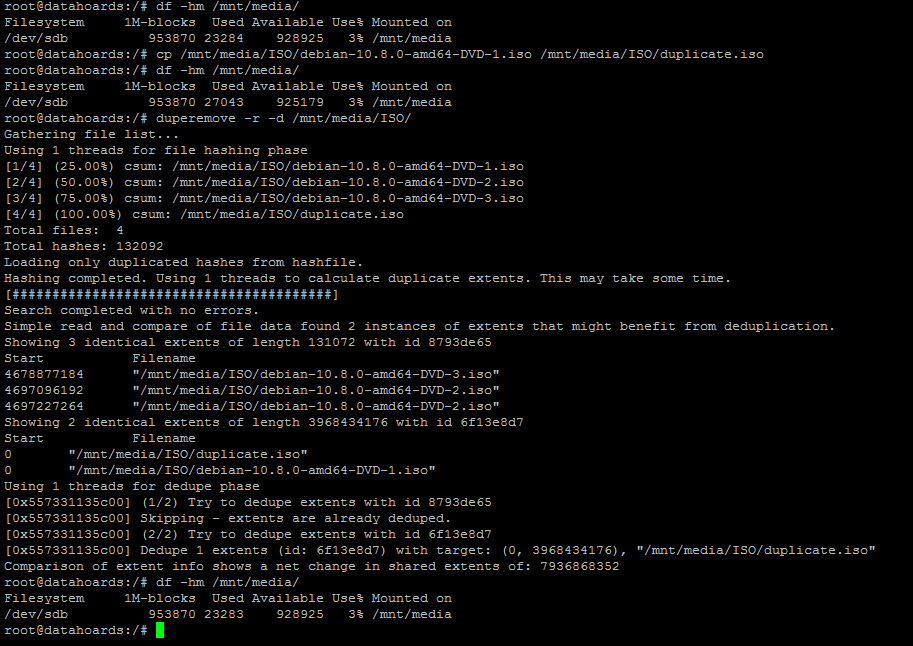
To see how effective deduplication would be when dealing with large duplicated files, I made a copy of a large ISO file and ran the same test:

As you can see, after duplicating the large file, the consumed space had increased by the size of the file, as we would expect. After running deduplication, the consumed space had fallen back to its original level yet the duplicated file was still intact.
I am quite impressed with the deduplication abilities of BTRFS when dealing with duplicate files. I wanted to give it a bit of a tougher test, however. I was keen to see how it would handle block-level deduplication of a large file. If two files were almost identical, would it be able to deduplicate all the duplicate blocks?
To test this, I again made a copy of a large file:

This time though, before deduplicating, I’m going to open the file in a hex editor (“hexcurse”) and modify a very small portion of it. A portion so small, that the changed data will most likely only alter a single underlying block, or perhaps two if we’re unlucky and it falls on a boundary.
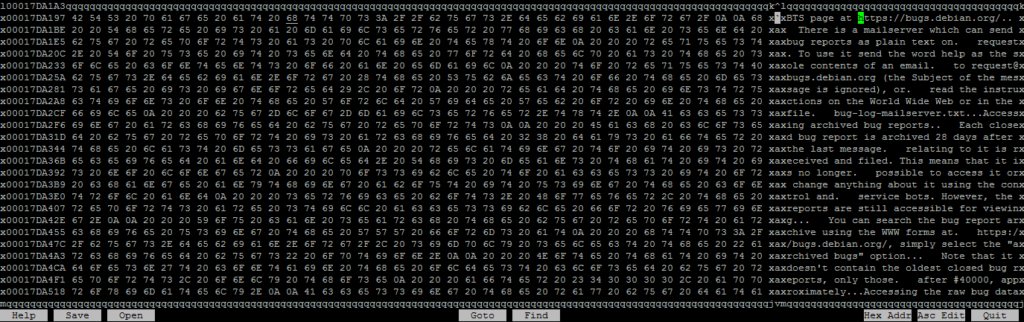
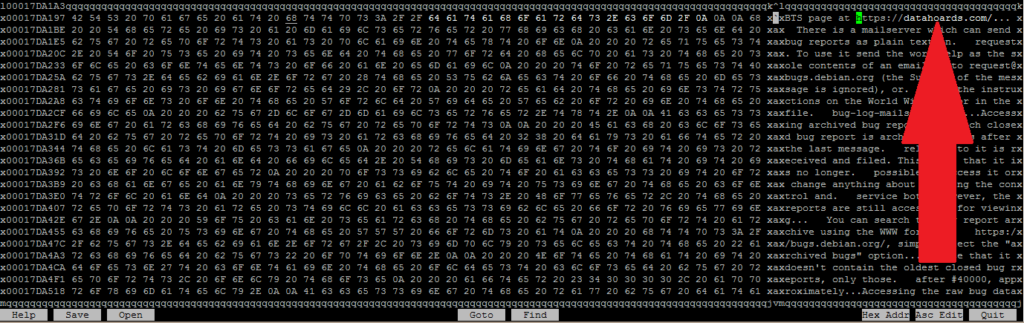
After saving the file, you can see that the original and altered files are identical in size, but the MD5 hashes are different, proving that one has been altered.

Now, we’d expect that before deduplication, the space consumed on the file system would have risen by the filesize of the copied (and now altered) file:

Now that’s been confirmed, let’s run deduplication and check the consumed space once more:
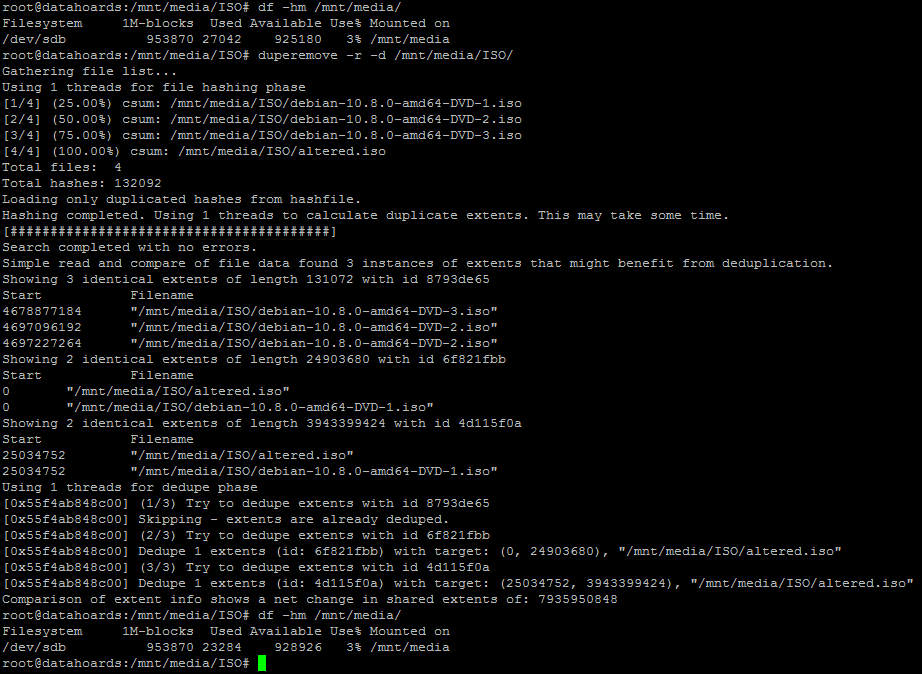
As you can see, the altered file has been almost entirely deduplicated. Excellent.
Summary
We’ve explored what compression and deduplication are, and learned that both technologies generally work well with the BTRFS filesystem.
Testing has shown us that compression doesn’t work well with data that’s already compressed (Video, Software, etc) but works well on uncompressed data (MIDI files, text documents, etc).
We’ve also proven that deduplication works well across the board, with the exception of very small files (those smaller than the default block size of 128KB in our case).
I’m probably going to extend my use of BTRFS compression and deduplication as a stop-gap. Hopefully, the cost of hard drives will return to a more reasonable level in the coming months and I can then review whether compression/deduplication is still worthwhile.
Zstd compression outperforms zlib both in speed and compression ratio. It can be fine tuned 🙂 Could even feed it sample data for better results. Zstd can also be accelerated using FPGA although not all of the compression levels.
Media files are precompressed could use encoding with higher compression ratio like AV1 or h.265 but without VPU on a video card it will be rather slow and energy intensive process to do so.
Dedupe table could be stored in SSD instead. Chunk size could be increased to reduce RAM and CPU usage.
very very nice article! it has been so helpful to me