Introduction
If you’re a data-hoarder, the thought of deleting any data once your hard drive is full probably fills you with a sense of terror (rightly so!). For most people, the best way to increase their free storage space is to install an additional hard drive into their PC. The process of adding a second, third, or even fourth hard drive is a lot simpler than in years gone by. With that said, there are still a few steps that need to be performed after installing a new hard drive. We’ll cover those steps in today’s post.
To be clear, we’re going to cover what needs to be done after installing a brand new, additional hard drive into your system. If instead, you are removing your existing drive and replacing it then this post will be of limited help. Similarly, if your “new” drive isn’t actually new (perhaps you bought it second-hand, or it was a gift from a friend who’s upgrading his storage), you may find that it’s already partitioned and formatted, so again, you may extract limited value from this post.
Overview
In brief, once a new hard drive is installed, it needs to be partitioned, and those newly created partitions then need to be formatted. If this all sounds foreign to you then don’t worry. The steps are actually quite straightforward. The process you need to follow will depend on the operating system that you’re running. Below are instructions for both Microsoft Windows and Linux.
As a side note, in years gone by, it used to be necessary to enter the system’s BIOS or UEFI after installing a new hard drive. From within the BIOS/UEFI, you would historically have had to enable the new drive, and even provide the system with some technical information about it (number of cylinders, number of heads, etc) before it would work. Fortunately, things have progressed and this is hardly ever needed on modern systems or even those of the past 15 years! For this reason, I’m not going to cover anything related to BIOS/UEFI in this post. If by some chance however you are trying to install a new hard drive into an ancient/legacy system and you can’t get it to work, bear in mind that this could be needed.
Windows
If like most people you’re running Microsoft Windows on your computer, these are the steps you’ll need to follow after installing a new hard drive. These steps will work on all currently supported versions of the Windows operating system. You may notice that some of the images look slightly different on your machine but the principles will remain the same.
Confirm that the new hard drive isn’t showing
Before we begin changing anything, let’s quickly check that the new drive isn’t already visible within Windows Explorer. If it’s a brand new drive that you’ve just unpacked and installed then Windows shouldn’t be able to assign a drive letter or display it in Explorer.
Open “This PC”
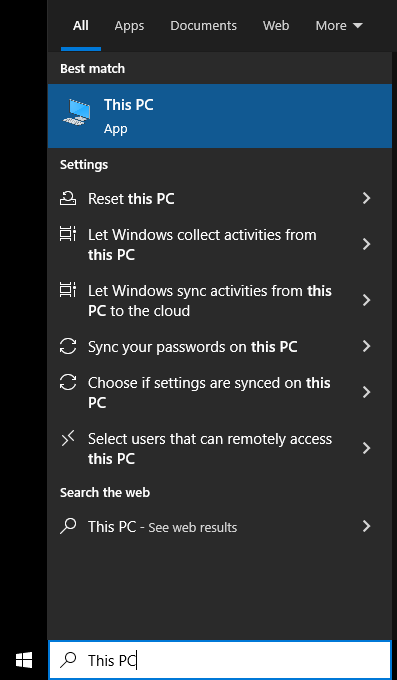
Click on your Windows start button and type “This PC”. Once the “This PC” icon appears, click on it. If you’re familiar with older versions of Windows, this used to be known as “My Computer” or “Computer”.
Check that the drive isn’t listed
Depending on how many hard drives, flash drives, or optical drives you have attached to your PC, the contents of your “This PC” window may look a little different. In the image below, you can see that this system only has the main (“C:”) hard drive (the one containing Windows) and one CD-ROM drive (“D:”) attached.
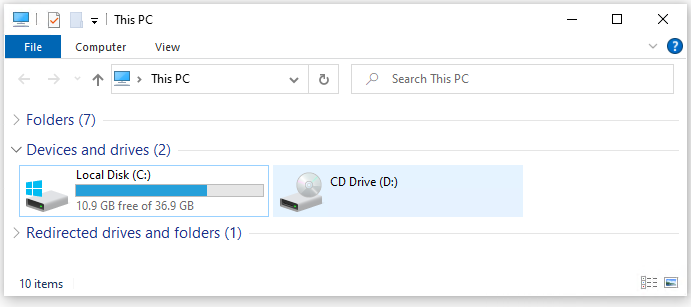
Our new drive isn’t showing here despite it being attached, which is what we should expect. If you’re in a similar position, please proceed.
Launching Disk Management
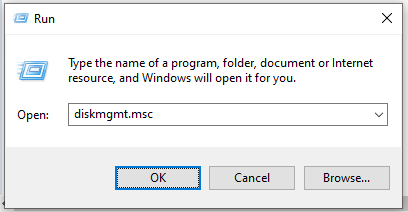
The most reliable way to launch Disk Management is to right-click on your Start button and then click “Run”. In the small “Run” dialog box that appears, type the command “diskmgmt.msc”, and then click “OK”.
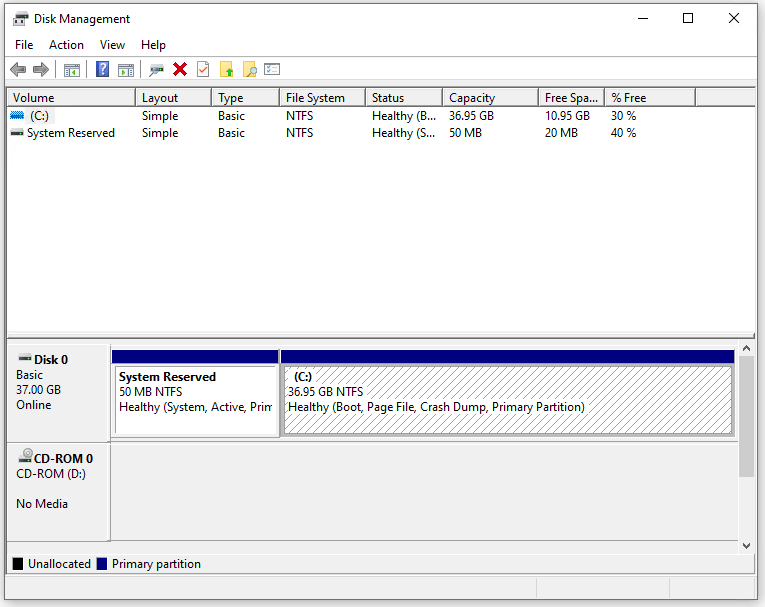
The Disk Management utility will open up, which as you may have gathered from its name allows us to manage various aspects of our system’s disks and storage.
If you suddenly get another window opening up asking if you wish to initialize the disk, just click “Cancel” for now. We will need to initialize it but we’ll do this later on.
Rescan Disks
The first step is to tell Windows that we’ve installed a new disk and ask it to rescan its storage interfaces to find it. This may or may not be necessary depending on your setup but it doesn’t do any harm.
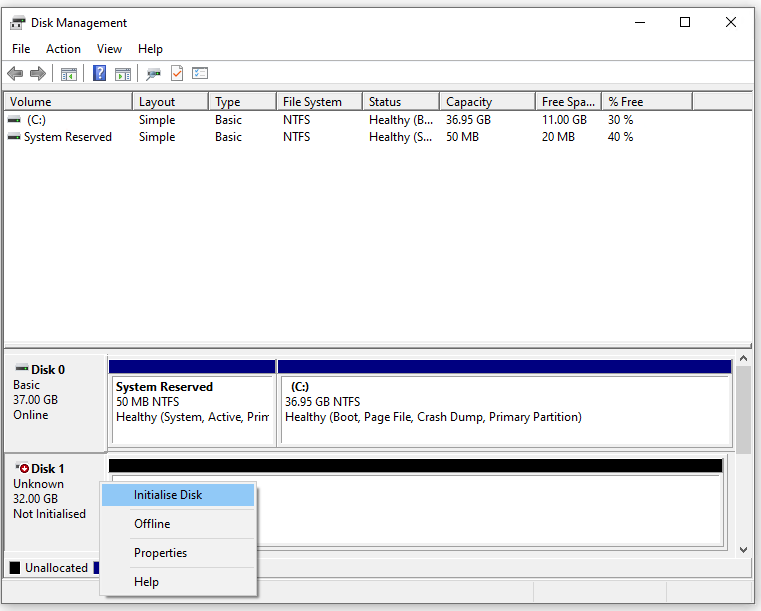
Click on “Actions” and then “Rescan Disks”. After a few seconds, the Disk Management window should update and you should find that your new disk is now listed. The new hard disk drive will be listed in the lower pane of the window with a status of “not initialized”.
Initialize the new disk
Right-click on the new disk and then click “Initialize Disk”. You’ll likely be asked if you wish to initialize the disk as “MBR” or “GPT”. If you’re not planning to later move the disk to a legacy computer, you can safely choose “GPT”. “GPT” is the more modern standard whereas “MBR” only really exists for historical reasons. “MBR” has a number of limitations, including a maximum size of 2TB, which isn’t huge nowadays.
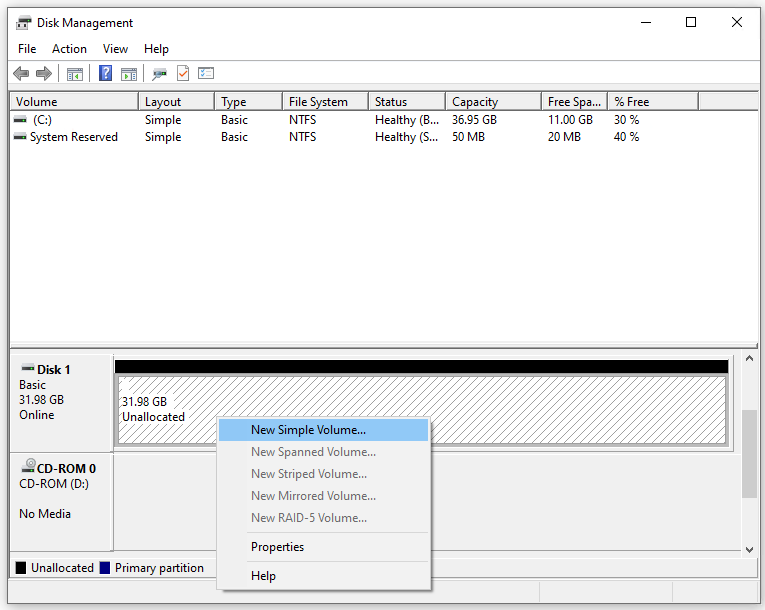
Create a new volume
Windows uses the terminology of “creating a new volume” when it refers to partitioning the disk. I mention this only in case you are familiar with the concept of disk partitions and think we’ve inadvertently missed something.
Assuming you just want to create one large partition/volume, then right-click on the “Unallocated” portion of your newly initialized disk and click “New Simple Volume”.
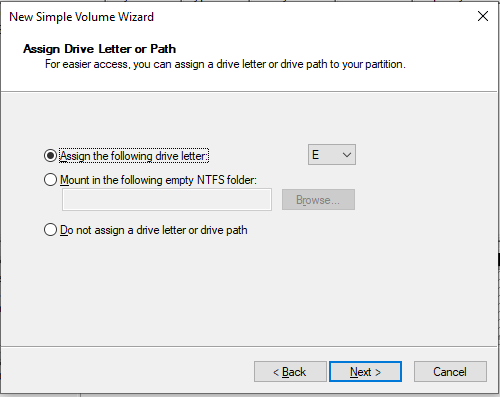
Click “Next” a couple of times, accepting the value that Windows suggests to create a volume of the maximum size. When it comes to choosing a drive letter for your new volume, you can again accept the value suggested by Windows (this will be the next available letter), or choose your own. In this case, I’m going to leave it as “E”.
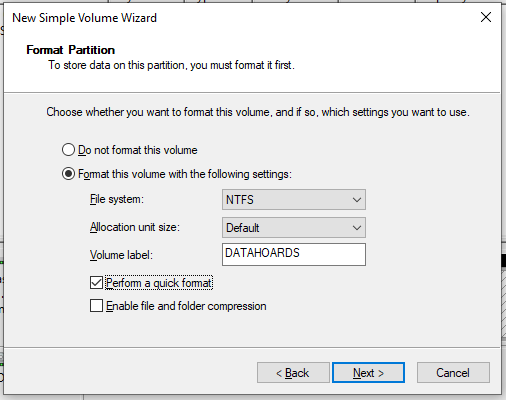
For data-hoarding purposes, you’ll likely want to format the new volume as “NTFS”. If you’re not sure what this means, then it’s unlikely you’ll need to change it. Leave the “Allocation unit size” as “default” and then provide a new label for your volume. The volume label can be almost anything, I’m going to call mine “DATAHOARDS” as that’s what the new volume will be holding! Leave “Perform a quick format” checked and then click “Next”, followed by “Finish”.
If you close Disk Management and go back into “This PC”, you should find that your newly installed hard drive is showing, with the drive letter we chose to assign earlier. At this stage, you are free to start filling it up.

Linux
If Linux is your operating system of choice then I’m sure setting up a new disk is a trivial task that you can do in your sleep, with both hands tied behind your back. If that describes you, then the rest of this post will be of little value to you. If perhaps you’re a newbie data-hoarder getting into Linux then hopefully the instructions below will provide some help when trying to install your new hard drive. We all had to start somewhere, right?
For the purposes of this post, the distro I’ve chosen to demonstrate this on is Debian. My reasoning for this is that it hopefully covers the majority of newbie Linux users (Ubuntu, Linux Mint, etc). If you’re using another distro, it may still provide some pointers and you’re probably experienced enough to fill in any blanks anyway.
Getting the ID of the new disk with lsblk
Before I install any new hard drives into my Linux boxes, I like to get a list of currently connected hard drives and make a record. This makes it a lot easier to identify new disks once they’re installed. In this example, it’s overkill really as I know I currently only have one disk installed. I’ll follow the usual procedure anyway, as it is useful in more complex setups with many disks.
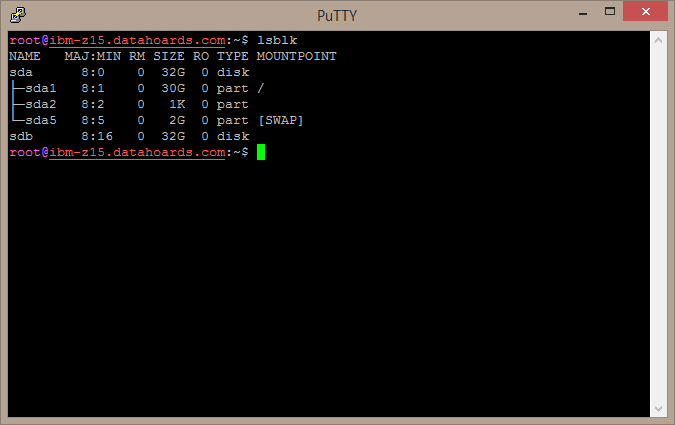
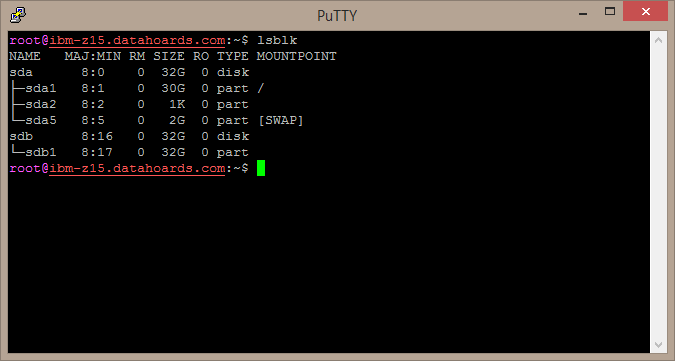
At the terminal, type the command “lsblk”. This will list all block devices (i.e. hard disk drives, for our purposes) currently attached to the system. You should see an output similar to that shown below.

As you can see, this is telling us that we have one hard drive installed (sda), partitioned into three (sda1, sda2, sda5).
Now, we need to shut down the system, physically install the hard drive and boot the system again. This time, when we run “lsblk”, with the new drive installed, we see that the new hard drive is listed as “sdb”.
Partitioning the new disk with cfdisk
To create a partition table on the new disk, I’m going to use “cfdisk”. It’s a tool I’ve been using for many years and it’s never let me down. Other tools are available!
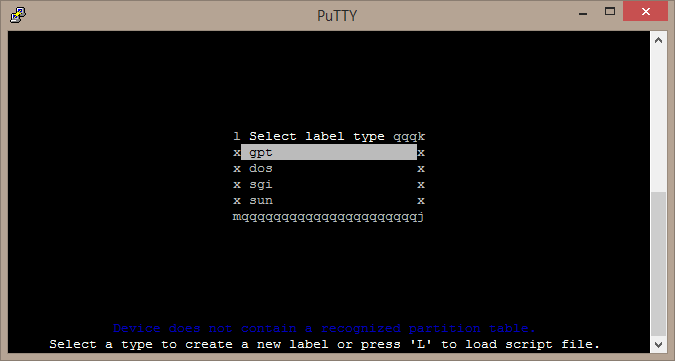
In this case, we issue the command “cfdisk /dev/sdb”. This will launch the cfdisk software, telling it to operate on the newly installed drive “sdb”.

As it’s a new disk, cfdisk will tell us that we need to create a partition table (this is what the Microsoft Windows “initialize disk” step did earlier). For this example, I’m going to choose “GPT”. If you’re unsure which option to choose, I recommend you stick to “GPT”.
At this point, we now need to create a new partition. The “New” option should already be selected so we just need to hit “Enter”.
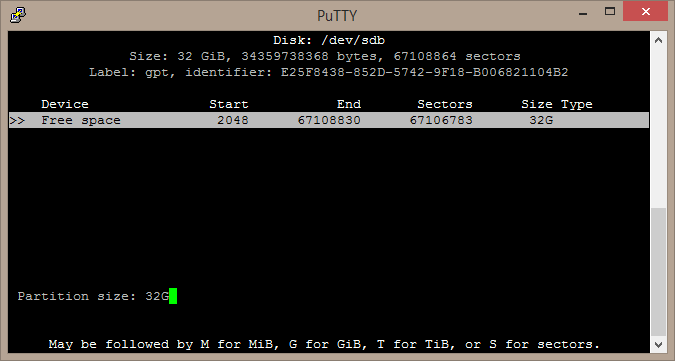
cfdisk will ask us what size we’d like the new partition to be, defaulting to the maximum possible. Again, just hit “Enter” in order to create one large partition consuming all the disk’s space.
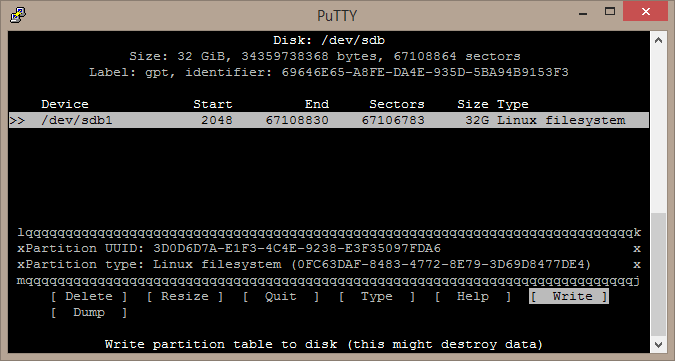
The default behavior of cfdisk is to create the new partition with the type set to “Linux Filesystem”. If you wish to change this, it’s simple enough from the “Type” menu. If you’re not sure, just leave it as “Linux Filesystem” and you’ll be fine.
To write the partition table to the disk, use your right arrow key to hover over “Write” and then hit “Enter”. Type “yes” when asked if you’re certain you wish to proceed and then quit cfdisk using the “Quit” option.
If we run the “lsblk” command once more, we’ll find that the new partition is listed as “sdb1”.
Formatting the new partition with mkfs
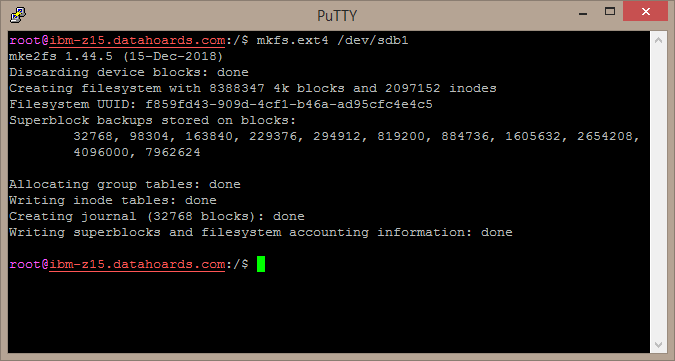
Now that our new partition has been created with cfdisk, we can format it. This is easy enough, we just need to type the command “mkfs.ext4 /dev/sdb1”. After a few minutes, you should see a screen similar to that shown below, indicating that the partition has been formatted as EXT4.
At this point, your newly installed hard drive has been partitioned, and the partition formatted, ready for your data. As a side note, if you’re familiar with Linux, you may wonder why I bothered partitioning the disk with cfdisk rather than just immediately formatting it as EXT4 with the command “mkfs.ext4 /dev/sdb”. The reason is that it’s quite rare that you would only have a single partition, especially on a large disk and I think it’s good practice to partition a disk in any case.
Summary
In this post, we’ve covered the steps that are necessary after physically installing a new hard drive into your PC. We’ve covered identifying the new hard disk, partitioning or initializing it, and then formatting it as appropriate. Hopefully, whether you are running Windows or Linux, you’ll have a grasp of what needs to be done and can now stop panicking that your system can’t see your new drive.
I may write another post covering other scenarios that can warrant the installation of a new hard drive. For example, I mentioned that this post isn’t very helpful for those replacing an existing system disk, so I might write another piece on cloning your existing (small) hard drive to a larger hard drive or SSD. Let me know if this would be useful or if you have any questions. As usual, enjoy your data-hoarding and don’t even dream about deleting anything!